INTRODUCTION
Fitting mirrored tiles, when no cutting is required, is straightforward and requires little equipment or experience. Cutting mirrored tiles, especially around switches and sockets, is a skilled procedure requiring specialist equipment. We have created this installation guide to help you understand the processes and equipment required. Confident D.I.Y enthusiasts should have no problem cutting and fitting tiles, but we recommend that less experienced individuals should employ a professional tile fitter.
Our mirrored tiles are not suitable for use in wet rooms or shower enclosures.

DETERMINING THE QUANTITY
Our mirrored tiles are sold by the box. Once you have selected your tiles, refer to their product description, this will advise how many boxes of tiles you will need to cover a one square metre area. You can calculate how many square metres of tiles you will need by following the steps below.
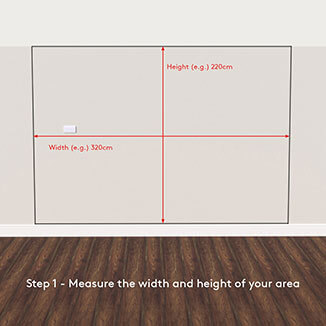
- Step 1: Determine and measure the width and height of your intended area, in centimetres.
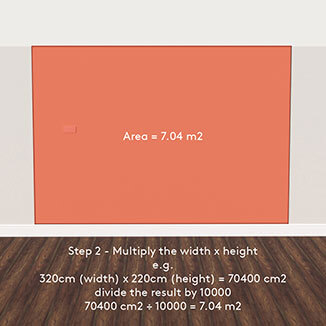
- Step 2: Multiply the width x height and divide the result by 10000.
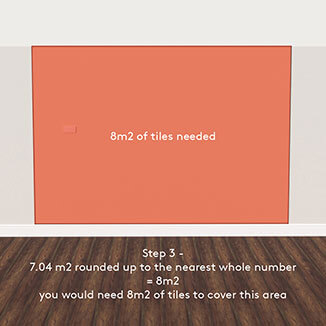
- Step 3: round the result up to the nearest whole number.
For example: Let’s say you have a 320cm width x 220cm height area you wish to tile.
- 320cm (width) x 220cm (height) = 70400 cm²
- 70400 cm² ÷ 10000 = 7.04 m²
- 7.04 m² rounded up to the nearest whole number = 8 m²
- You would need eight square metres of tiles.
If in any doubt about calculating the area, or if you have an irregular shape, there are online tools available, such as
https://www.calculator.net/area-calculator.html?reclength=100&reclengthunit=centimeters&recheight=100&recheightunit=centimeters&calctype=rectangle&x=0&y=0#rectangle
GENERAL EQUIPMENT
This is an overview of tools required for cutting and installing mirrored tiles. Depending on the complexity of your installation, some or all this equipment will be required. All tools listed are widely available online and in D.I.Y stores nationwide.
Tape measure
An essential item for measuring your intended tiling area and determining quantities and trim positions. Prices from as little as £1.00.
Steel ruler
An essential item for marking straight lines and guiding the glass cutter. Prices from £1.99.
Fine-line whiteboard marker
These are useful for marking tiles as lines can be erased once the cuts are complete. Available for around £1.50.
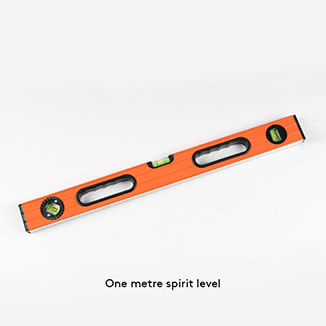
Spirit level
To achieve a perfectly horizontal or vertical edge to your tiled area you will need a spirit level, (or laser level, if budget allows). The longer the level, the easier it is to create a perfect line. We recommend a minimum of one metre in length. Prices start at around £5.00.
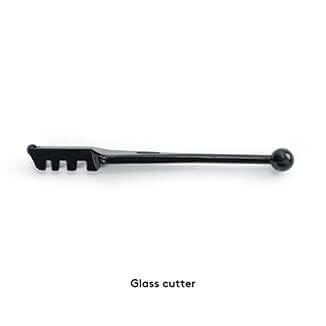
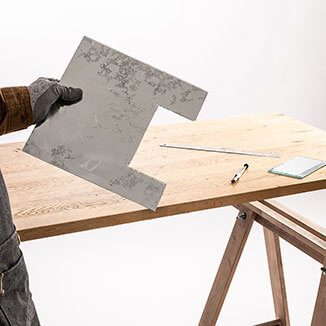
Glass cutter
This affordable tool will make straight cuts and is essential for making ‘U’ shaped cuts. An easy to use and essential item. Prices start at around £3.00.
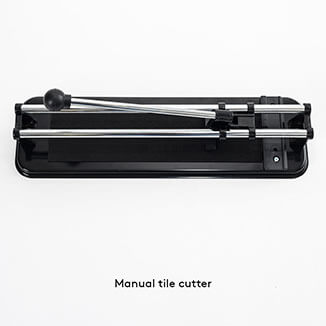
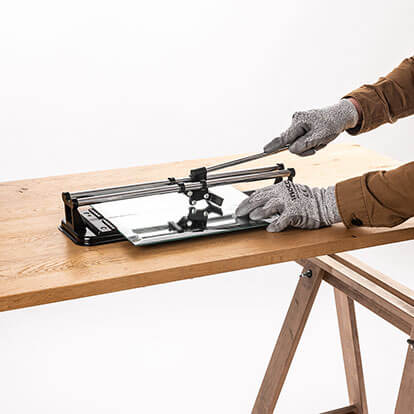
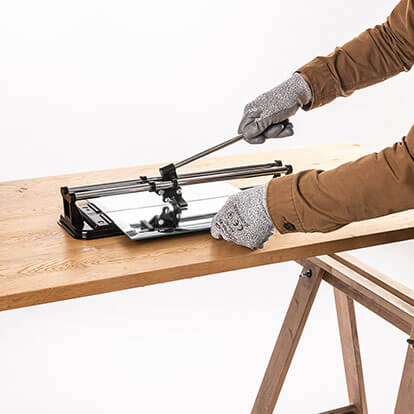
Manual cutter
For making straight cuts, a manual cutter is a reliable and affordable device that creates neat cuts very easily, prices start at around £15.00.
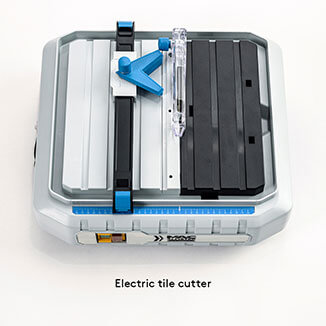
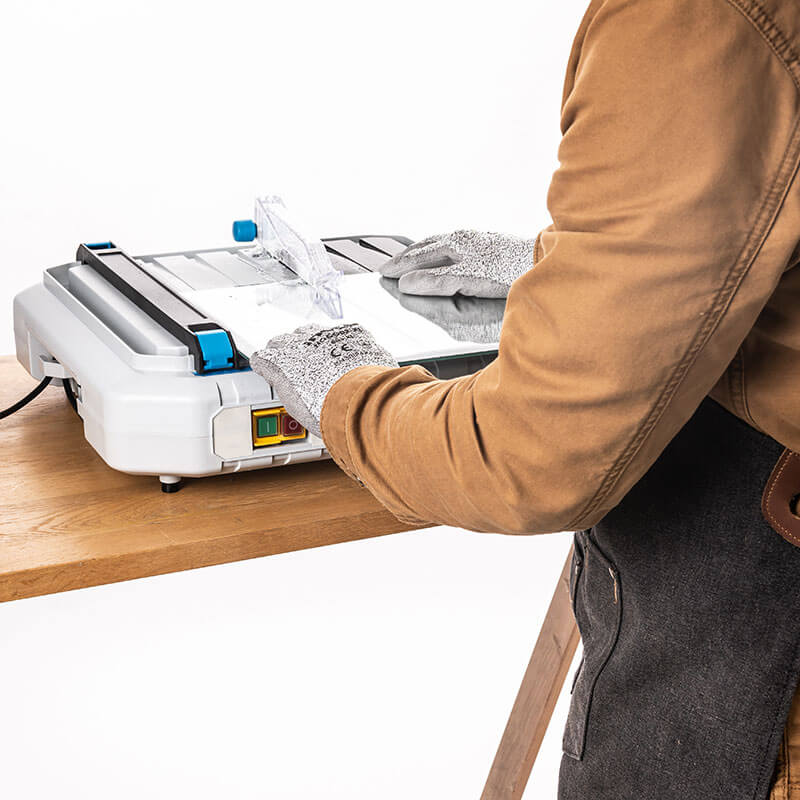
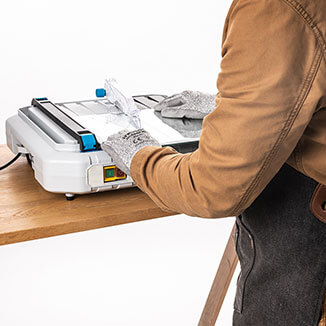
Electric tile cutter
If you need to tile around obstacles such as switches and sockets, you will have to make ‘corner’ or ‘u shaped’ cuts, we recommend that you either employ a professional tile fitter or hire/buy an electric tile cutter, (prices start at around £50.00). They are straightforward to use providing you read the setup and operating instructions. As with using any of this equipment, ensure that suitable clothing, safety glasses and protective gloves are worn, as sharp particles are created when cutting.
Tile nippers
This handy tool is ideal for removing corners and trimming jagged edges. It is not essential for basic tiling but useful if you have difficult obstacles to tile around. Prices start at around £10.00.
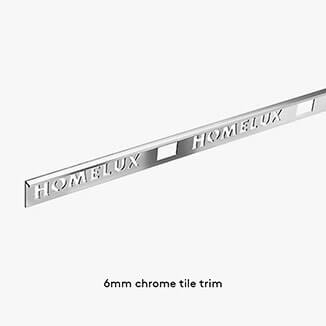
6mm tile trim
We strongly recommend using tile trims as they cover the sharp edges created by cutting and provide a neat, finished edge. Widely available in all manner of materials and colours, we prefer a simple chrome version to match the tiles. Generally sold in 2.5-metre lengths, prices start from £3.99 apiece.
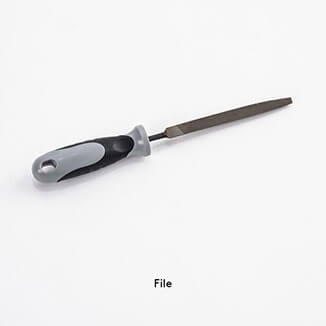
File
If you are not using tile trims and have exposed cut edges you will need to blunt them with a file (before installation). Specific glass files are available, but a fine gauge file will suffice. Prices start at around £5.00.
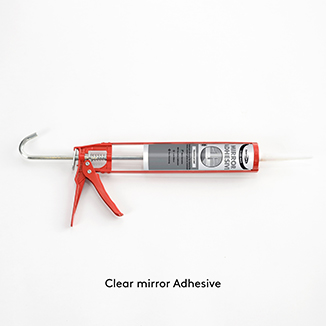
Clear mirror adhesive
We recommend using clear mirror adhesive to fix your tiles to your wall. It can be purchased for as little as £4.00. As a rough guide, one tube will be enough to fix 1 square metre of tiles.


PROTECTIVE EQUIPMENT
You will be handling and cutting glass, creating extremely sharp edges, debris and offcuts. To avoid injury and even blindness we strongly advise that before starting work, the following items are worn.
Protective / old clothing
A common sense precaution.
Safety Glasses
An essential item. Do not attempt to cut mirrored tiles without these. They can be purchased for as little as £1.00.
Cut-resistant gloves
These are not essential but highly recommended. Prices start from around £3.00. (A pair of sturdy gardening gloves would also be sufficient).


PREPARATION
Ensure that your wall is smooth, clean, dry and that there is no flaking paint, otherwise the tiles may not stick.
Set up a clean, clear workspace, unbox all tiles and layout all equipment close to hand. This will help create an uninterrupted, efficient workflow.
If you have obstacles such as sockets or switches you will need loosen them to fit the tiles behind, this will result in a neat and professional finish. Before doing so, it is critical to turn the power to these off on your fuseboard/consumer unit. Once turned off, double check that there is no power going to them by plugging in an appliance and ensuring it does not turn on, then test the light switches.
Once you are confident that there is no power going to them, loosen the covers with a screwdriver, but do not entirely remove them. If in any doubt, consult a qualified electrician.
TYPE OF CUTS
There are three main types of cut that you may need to make, these are listed below with advice on techniques and recommended tools.
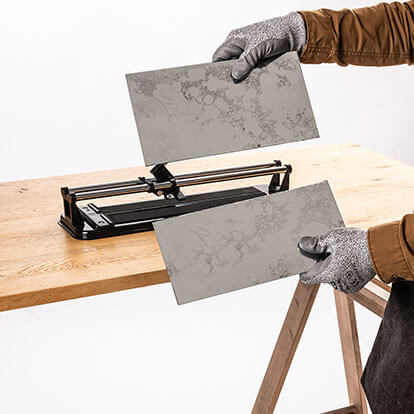
Straight Cut
A basic operation that can be made with a glass cutter, manual cutter or electric tile cutter.
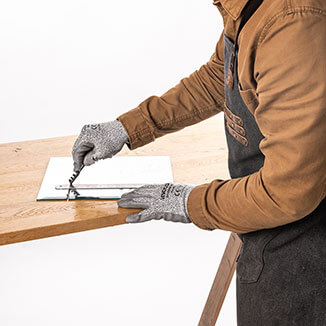
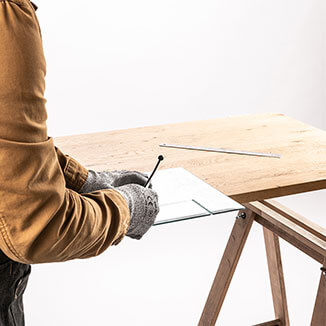
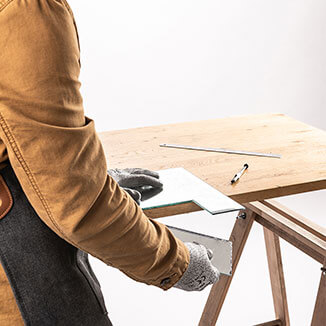
Using a glass cutter:
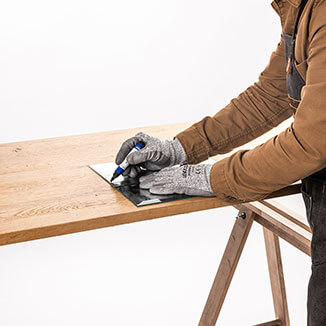
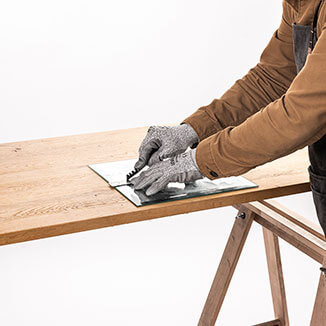
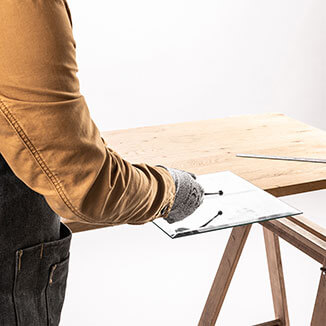
- Measure and mark where to cut the tile.
- Using the steel ruler as a guide score the glass surface of the tiles several times, from edge to edge, with the wheel of the glass cutter. You should here a definite ‘zipping’ sound.
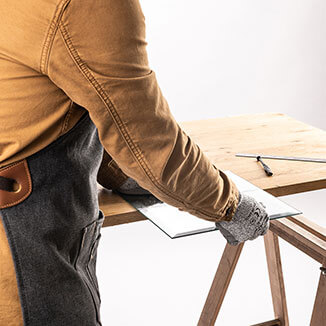
- Position the scored line on the tile with the edge of your worksurface.
- Gently tap the overhanging area several times with the ball end of the cutter.
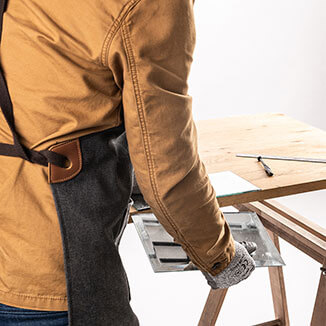
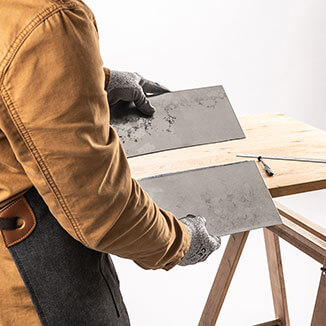
- Ensuring that the score line is exactly in position with the edge of your work surface, hold onto the tile and sharply push down on the overhanging area. It should create a neat straight cut.
Using a manual cutter:
- Measure and mark where to cut the tile.
- Position the tile in the cutter, with the marked line in the centre.
- Using the handle, lower the cutting wheel gently to meet the tile surface.
- Whilst holding the tile in place, move the cutting wheel several times back and forward from edge to edge of the tile. You should here a definite ‘zipping’ sound.
- Straddle the scored line with the flat tool head next to the cutting wheel.
- Push down on the handle to create a perfect straight cut.

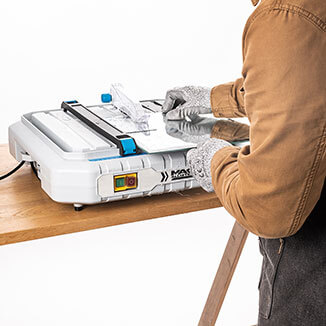
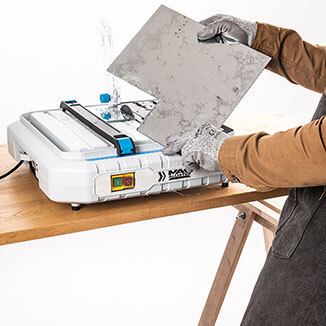
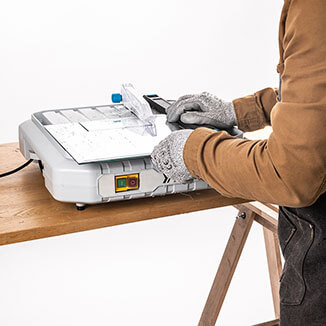
Using an electric tile cutter:
- Carefully read the operation manual.
- If it is a ‘wet’ type cutter, fill the reservoir according to the instructions.
- Measure and mark where to cut the tile.
- If your cutter has a parallel cutting guide, position it accordingly.
- Ensure the cutting disc guard is lowered into place.
- Turn on the machine.
- Position your tile against the parallel guide and gently push it through the cutting wheel until the cut is complete.
- Turn off the machine.
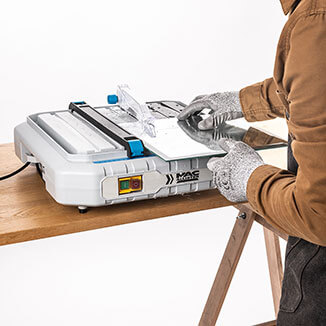
Corner cut
This can only be made using an electric tile cutter.
- Carefully read the operation manual.
- If it is a ‘wet’ type cutter, fill the reservoir according to the instructions.
- Measure and mark where to cut the tile.
- If your cutter has a parallel cutting guide, position it accordingly.
- Ensure the cutting disc guard is lowered into place.
- Turn on the machine.
- Position your tile against the parallel guide and gently push it through the cutting wheel to make the first cut.
- Rotate the tile 90 ° and make the second cut.
- Turn off the machine.
‘U shaped’ cut
You will need to use both an electric cutter and a glass cutter.
- Carefully read the electric cutter operation manual.
- If it is a ‘wet’ type cutter, fill the reservoir according to the instructions.
- Measure and mark where to cut the tile.
- If your cutter has a parallel cutting guide, position it accordingly.
- Ensure the cutting disc guard is lowered into place.
- Turn on the machine.
- Position your tile against the parallel guide and gently push it through the cutting wheel to make the first cut.
- Reposition the parallel guide and make the second cut.
- Turn off the machine.
- Use the glass cutter to create the third cut. (Further information in the ‘straight cut’ section above)
CUTTING AND FITTING TILES
Careful planning and preparation will enable a smooth installation. We recommend having everything prepared in advance and allowing ample time to fit the tiles in one session. This way minor adjustments can be made before the silicone has set, if required.
IMPORTANT – Do not use grout with mirrored tiles, as it will scratch the surface.
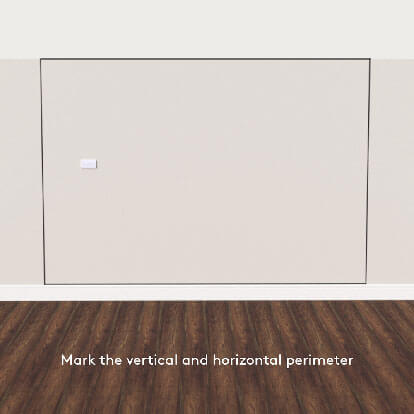
- If you are tiling a non-boundaried area, (i.e., not contained by two walls) measure and mark vertical and horizontal lines, outlining the perimeter. This will give you a guide to tile to and show where to position tile trims and make cuts.
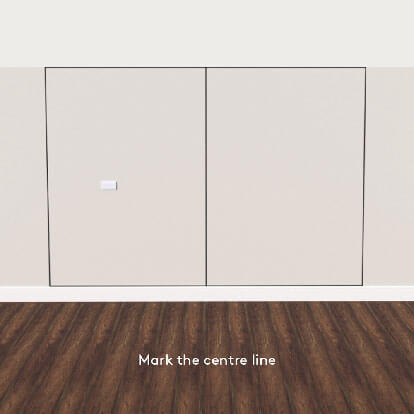
- Measure the centre point and mark it with a vertical line, using a spirit level.
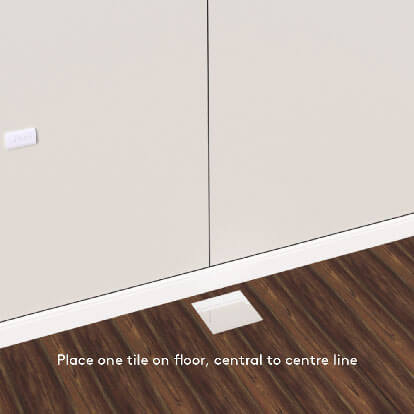
- Place one tile on the floor, central to the vertical mark.
- Continue to place more tiles, either side of the first one to determine how many tiles you will need to complete the width and where the cuts will need to be.
- Measure and make a rough sketch of the area and any obstacles to determine the total quantity of tiles and type of cuts required.
- Make all the basic straight cuts at this point but leave any more intricate cuts (such as around sockets and switches), for when tiling so that a close fit can be achieved.
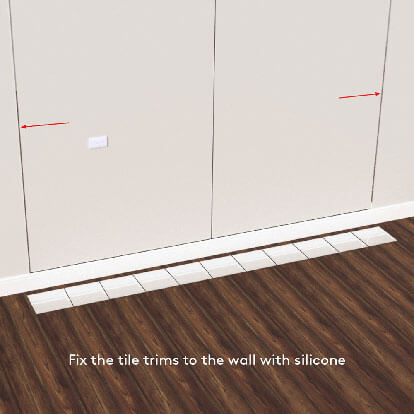
- Cut and fix the tile trims in place with silicone, the silicone will remain unset for several hours, allowing for adjustment of required. If you are not planning to use tile trims, ensure that any cut edges have been sufficiently filed to blunt them.
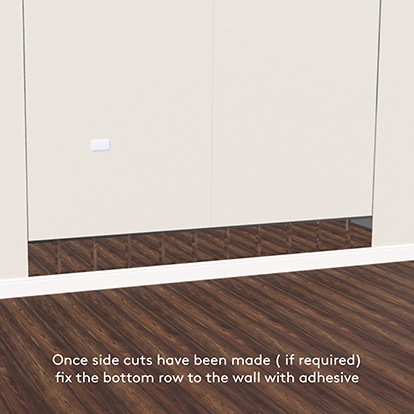
- Start with the bottom centre tile. Apply a bead of mirror adhesive about one centimetre within the perimeter of back of the tile and a make a corner-to-corner cross.
- Firmly push the tile to the wall.
- Complete the bottom row of tiles.
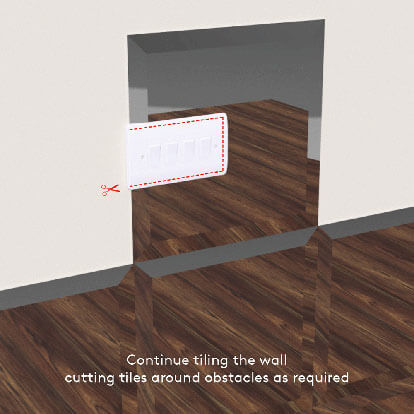
- Fix the centre tile of the second row, then complete the second row.
- As you work up the wall, you may encounter obstacles such as sockets and switches. Tile as close as you can up to them with the whole tiles, then measure and make any ‘corner’ or ‘U’ shaped cuts individually, as required.
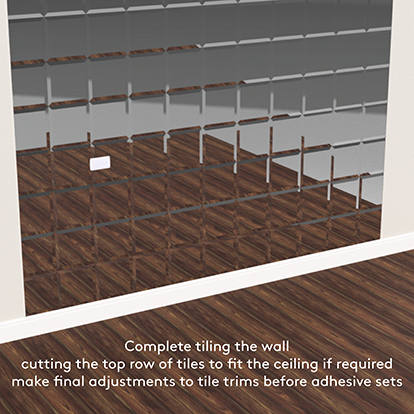
- Finish fitting all the tiles, then adjust the tile trims to perfectly meet the edges of the tiles.
- Allow 4-5 hours for the tiles to start setting, then remove any excess adhesive with a blade or isopropanol.

For further information please refer to the video in the link below.
For more inspiration or to see our full range of mirrored wall tiles, visit our website my-furniture.com.
For sales and product enquiries, contact us at customerservice@my-furniture.co.uk or 0800 092 1636.
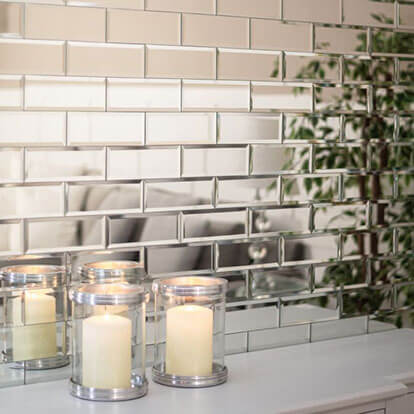
Large mirrored rectangle wall tiles, bevelled

Hexagonal mirrored wall tiles, bevelled
Large circular rug, 100% wool
Rectangle mirrored wall tiles, bevelled

Square mirrored wall tiles, bevelled

Diamond mirrored wall tiles, bevelled

Rectangle vintage effect mirrored wall tiles, bevelled

Square vintage effect mirrored wall tiles, bevelled